Search

Loading

News

Ads:

March 16, 2012

Themes in ASP.net

Introduction: Themes are the way to define the formatting details for various controls and can be reused in multiple pages. Later, by applying minor changes on the themes, the complete appearance of website can be changed with maintaining consistency.
Why another formatting feature? CSS is a very convenient formatting feature but it is limited to the generic formatting details (fonts, borders, background etc) but sometimes it’s required to achieve control specific formatting. Asp.net 2.0 provides a new feature, “Themes”, to fill this gap.
It’s different to CSS in several manners:
1. Themes are control based not Html Based.
2. Themes are implemented on the server side while in case of style sheets; client receives both page and css and combines them at client side.
3. Themes can be applied through configuration files.
4. Themes provide the flexibility to retain the css feature instead of blindly overriding it.
Creating Themes Folder:
Create a folder (with specific name) under App_Theme folder, which is under application main directory then add one or more skin files (text file with .skin extension) under the created theme folder. Application may contain many themes and all of them should be defined under different theme folders. But only one theme can be active on a page at a time.
Creating Skin Files:
Skin file is a text file with .skin extension. It contains a set of control tags with standardized properties as:
<asp:TextBox runat="server" BackColor="Orange"/>
The runat="server" portion is always required. Everything else is optional while id attribute is not allowed in a theme.
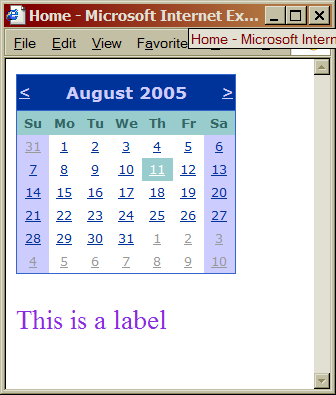
It’s also possible to place multiple skin files under the theme folder, but ASP.NET treats them all as a part of single theme definition. It’s more useful in case if separate skin files are written for complex controls (Calender, Grid View) to distinguish   their formatting from other simple controls.
Note: Visual studio doesn’t provide any design time support for creating themes, so it’s better approach to copy the tag from the web page and modify it as per theme definition.
Applying Themes: To apply the theme in a web page, you need to set the Theme attribute of the Page directive to the folder name for your theme. (ASP.NET will automatically scan all the skin files in that theme.)
<%@ Page Language="C#" AutoEventWireup="true" ... Theme="MyTheme" %>
Once a theme is applied to a page, ASP.NET considers each control on that web page and checks the registered skin files to see if they define any properties for that control. If ASP.NET finds a matching tag in the skin file, the information from the skin file overrides the current properties of the control.
But sometimes, it’s required to override some of theme properties with self defined properties. This can be achieved by using StyleSheetTheme attribute in place of Theme. It will restrict the theme settings for those control properties which are already set and the other properties will take configuration from themes (The same thing happens when we apply css classes).
<%@ Page Language="C#" AutoEventWireup="true" ... StyleSheetTheme="MyTheme" %>
There is also an option (EnableTheming = ‘False’) to restrict themes for all the properties under the specific control.
<asp: TextBox ID="TextBox1" runat="server" ... EnableTheming="false" />
Creating multiple skins for the same control:
If more than one theme is defined for the same control, ASP.NET gives build error. But the situation can be handled by supplying SkinID attribute to the conflicting themes for the same control.
<asp:TextBox runat="server" BackColor="Orange" />
<asp:TextBox runat="server" BackColor="Red" SkinID="Dramatic"/>
Correspondingly, set the particular SkinId for the web control.
<asp: TextBox ID=" TextBox 1" runat="server" ... SkinID="Dramatic" />
Note: It’s possible to use same skinID for several themes which are associated to different control.
<asp:TextBox runat="server" BackColor="Red" SkinID="Dramatic"/>
<asp:ListBox runat="server" BackColor="Red" SkinID="Dramatic"/>
Using CSS in a theme: Themes can be further standardized using css classes. To do so, place the css class under the respective theme folder. ASP.Net searches for all css classes under this folder and dynamically binds them to the web page (that uses this particular theme) through link attribute (It’s only possible if runat=”server” attribute is setfor the web page <head> section)
<head runat="server">
Applying themes through configuration files:
A particular theme can be applied throughout the web site using We.Config file. As:
<Configuration>
<system.web>
<pages theme="MyTheme" />
OR
<pages styleSheetTheme="MyTheme" />
</system.web>
</Configuration>
Applying themes dynamically:Use Page.Theme or Page.StyleSheet property(Page.Theme=”MyTheme”) at the Pre_Init event. So if it’s required to change the theme, the pre_init event should be triggered again. This can be achieved by forcefully performing page postback(eg, page redirection to same page).
Similiary, the control’s SkinID property can also be set dynamically, in case of named skins.
One of the limitations of applying themes dynamically is that you can't apply theme within a user control or master page as neither of them has a Pre_Init event.

Themes In ASP.NET 2.0


Let’s get started understanding how themes work with a simple example.

Creating A Theme

Themes, unlike master page files, need to live underneath a special directory by the name of App_Themes. Visual Studio will add an App_Themes folder to a web application when you right click the web project, select Add Folder from the context menu, and select the Theme folder item.
Also unlike master pages (which are single files), themes consist of a collection of files. A theme may contain .skin files, style sheets, and even image files. To organize and name themes, we use subfolders in App_Themes. In the following screen shot, we have a theme by the name of “Odeish” and a theme by the name of “Codeish”.

Inside of our Odeish folder we will create a .skin file. You can add as many .skin files to a theme as you need. Each skin file will contain one or more control skins. A control skin specifies the property settings to apply to a specific type of control.
In our example, we will create a skin file with the name of Calendar.skin. Although our skin file will only contain the control skin for a single type of control – the Calendar control, we could take a different approach and add all the control skins for a theme inside of a single skin file. In this case our Calendar.skin file will contain the following.

<asp:Calendar runat="server" BackColor="White"
              BorderColor="#3366CC" BorderWidth="1px" CellPadding="1"
              DayNameFormat="Shortest" Font-Names="Verdana" Font-Size="8pt"
              ForeColor="#003399" Height="200px" Width="220px">
  <SelectedDayStyle BackColor="#009999" Font-Bold="True"
                    ForeColor="#CCFF99" />
  <SelectorStyle BackColor="#99CCCC" ForeColor="#336666" />
  <WeekendDayStyle BackColor="#CCCCFF" />
  <OtherMonthDayStyle ForeColor="#999999" />
  <TodayDayStyle BackColor="#99CCCC" ForeColor="White" />
  <NextPrevStyle Font-Size="8pt" ForeColor="#CCCCFF" />
  <DayHeaderStyle BackColor="#99CCCC" ForeColor="#336666" Height="1px" />
  <TitleStyle BackColor="#003399" BorderColor="#3366CC" BorderWidth="1px"
              Font-Bold="True"
              Font-Size="10pt" ForeColor="#CCCCFF" Height="25px" />
</asp:Calendar>
Notice a control skin looks just like the declaration of a server-side control in an ASPX or ASCX file, with the exception that we don’t set the ID property in the skin. The runtime will apply the property values and styles in this skin to all of the calendar controls on every page using the Odeish theme.
Here is another example showing the control skin for a server side Label control. We can place this skin inside a second skin file in the Odeish theme by the name of Label.skin. This skin will set all of our Label controls with a BlueViolet ForeColor property.

<asp:Label runat="server" ForeColor="BlueViolet" />
You can generally skin any appearance related property on a control, but not all properties. Some properties, like the ID and EnableViewState properties have metadata set to forbid setting the property via a skin (the System.Web.UI.ThemeableAttribute will be present on the property with a value of false). The ThemeableAttribute can also be applied at the class level to mark an entire control as themeable or not. The Repeater control is not themeable because it derives from the Control class which is marked with Themeable=false. Any control deriving from WebControl will have themeing enabled by default.

Applying A Theme

There are several ways to apply a theme to your pages. In the following web form we’ve set the theme using the Theme attribute of the @ Page directive.

<%@ Page Language="C#" AutoEventWireup="true"
        CodeFile="Default.aspx.cs" Inherits="_Default"
        Theme="Odeish" %>

<!DOCTYPE html PUBLIC "-//W3C//DTD XHTML 1.1//EN"
          "http://www.w3.org/TR/xhtml11/DTD/xhtml11.dtd">
<html xmlns="http://www.w3.org/1999/xhtml">
<head runat="server">
    <title>Home</title>
</head>
<body>
    <form id="form1" runat="server">
        <div>
            <asp:Calendar ID="Calendar1" runat="server" />
            <br />
            <asp:Label ID="Label1" runat="Server" Text="This is a label" />
        </div>
    </form>
</body>
</html>
Even though we have not set any of the display properties on the calendar or label controls, the above web form will render with the colors and styles from our theme, as shown in the next screen shot.

Note: there is no support in the designer for creating skins (only the text editor), nor for viewing a themed page. The only way to see the end result is to view the page in a browser after a successful build.
It’s also important to point out that the property value specified by a theme will override any property value in the ASPX markup. For instance, even if we marked our Label control with ForeColor=”Black” in the ASPX markup, the Label would render with a BlueViolet color, because that is the color specified by the theme.
You can also set themes at the application level using web.config (or at the machine level using machine.config). Use the theme property of the <pages> section as shown below. You can override the configuration setting with the Theme attribute in the @ Page directive.

<?xml version="1.0"?>
<configuration xmlns="http://schemas.microsoft.com/.NetConfiguration/v2.0">
    <system.web>

       <pages theme="Odeish" />
       <compilation debug="true"/>
       <authentication mode="Windows"/>

    </system.web>
</configuration>
If you are setting themes at the machine level, you’ll want to have themes defined at the machine level. Machine-wide themes need to be located in %WINDIR%\Microsoft.NET\Framework\\Themes.
We can programmatically set the theme for a page. Like the MasterPageFile setting we discussed in the master page article, the Theme property must be set in the PreInit event of a page. This is because the skins in a theme are applied after the PreInit event fires but before the Init event fires. Later in the article we will take a closer look at how the runtime applies skins.

public partial class _Default : System.Web.UI.Page
{
    protected void Page_PreInit(object sender, EventArgs e)
    {
        Theme = "Odeish";
    }
}
Programmatically setting the theme is useful when you allow users to personalize your site and select their preferred look and feel. You could store a user’s preferred theme in the Profile object of ASP.NET 2.0, and set the theme during the PreInit event of each page they view.
Now that we’ve seen the basics of how to create and apply themes, we can dig into more details.

Named Skins

You can only specify one default control-skin in a theme per control type. In our example, it would not make sense to define a second skin for the Label control in the Odeish theme since we already have a skin defined for Label, and ASP.NET would not know which to use. However, you can specify alternative named skins for a control with the SkinID property.
In the skin file that follows, we’ve defined the default skin for a label to use a BlueViolet color, while the skin named BlackLabel will use a black forecolor.

<asp:Label runat="server" ForeColor="BlueViolet" />
<asp:Label runat="server" ForeColor="Black" SkinID="BlackLabel" />
Inside of the following web form excerpt, the first label control will use the default control skin (assuming the page’s Theme property is set properly), while the second label control uses the BlackLabel named skin.

<body>
    <form id="form1" runat="server">
    <div>
        <asp:Label runat="server" ID="label1"
            Text="Hello World" />
        <br />
        <asp:Label runat="server" ID="label2"
            Text="Hello World" SkinID="BlackLabel" />
    </div>
    </form>
</body>

Overriding Themes

Earlier, we mentioned how a skin will overwrite any display properties we set on a control in our ASPX page. There might be times when this is not the desired behavior. One way to avoid the application of skin properties is to disable themeing for a specific control (or for an entire page) by setting the enable themeing property to false.

<asp:Label runat="server" ID="label1"
           Text="Hello, from OdeToCode"
           ForeColor="Green" EnableTheming="false" /> 
The EnableThemeing property will cascade through child controls. For instance, if you set EnableThemeing=false on a Panel or user control, any control inside of the panel or user control will not be themed.
A second way to use individual control properties is by specifying a StyleSheetTheme instead of a Theme. Unlike the properties applied by a Theme, the properties applied by a StyleSheetTheme can be overridden in a page. In the following webform, the first Label will display with the BlueViolet color of the Odeish theme, while the second label will override the skin setting and display with a DarkSalmon color.

<%@ Page Language="C#" AutoEventWireup="true"
    CodeFile="Default4.aspx.cs" Inherits="Default4"
    StylesheetTheme="Odeish" %>

<!DOCTYPE html PUBLIC "-//W3C//DTD XHTML 1.1//EN"
        "http://www.w3.org/TR/xhtml11/DTD/xhtml11.dtd">

<html xmlns="http://www.w3.org/1999/xhtml" >
<head runat="server">
    <title>Untitled Page</title>
</head>
<body>
    <form id="form1" runat="server">
    <div>
        <asp:Label runat="server" ID="label1" Text="Hello World" />
        <asp:Label runat="server" ID="label2" Text="Hello World"
        ForeColor="DarkSalmon"/>
    </div>
    </form>
</body>
</html>
Just to be clear: if we had specified a Theme instead of a StyleSheetTheme, both labels would display with the BlueViolet color. If we were to specify a Theme for our pages in web.config, the web.config Theme setting would override this StyleSheetTheme and both Labels would display in BlueViolet.
Interesting note: the Visual Studio designer will display the form with the skins applied when a StyleSheetTheme is in effect. The designer does not apply skins when a Theme is in effect.

Themes and CSS Style Sheets

Themes and CSS files can work together to control the look of your application. You can add one or more .css files into a theme directory. ASP.NET will automatically apply all of a theme’s style sheets into a page by injecting a <link> element for each .css into the header of a page. Your page must have runat=”server” in the <head%gt; tag for the automatic style sheet inclusion. The pages created by the IDE have this setting automatically.
For instance, we can control the background color of our page using the following style sheet.

body
{
    background-color:Gray;
}
Obviously, style sheets and skins have some overlap. For instance we could use a skin to set the ForeColor of our label, or we could have used a CSS class to set the color of our label text (perhaps by setting the CssClass property of the label with a skin).
Here are some points to consider when deciding on a skin file versus a style sheet entry.

  • Web designers will be more comfortable with css files. If you put the design of your site into the hands of professionals than you should be asking them to use css wherever possible. This will allow you to just drop new and updated css files into the theme folders and be ready to go.
  • Developers might be more comfortable with skins. Since skins look just like a control declaration, a developer will have an easy time creating a skin file. There is also no need to know in advance what HTML a complex server-side web control will produce in order to write the correct class and styles.
  • Skins are applied server-side and can set more than just style related properties. For example, in our Calendar.skin example we were able to set a default for the DayNameFormat for all calendar controls using the theme.
  • Likewise, you can control some areas with CSS (like the body element above) with style sheets and not skins
  • While the settings in a style sheet cascade, the properties in a skin are absolute, i.e. you can override a style sheet with a local setting but not a skin (unless you take one of the steps outlined in this article).
  • Different browsers may react to style sheets in different ways. You can count on skin files to always apply their properties to controls consistently on the server (it’s up to ASP.NET to translate those settings into the correct settings for the client).

Themes with Images

You can also include images in the themes directories. Images inside of themes are particularly useful for controls like the TreeView, and Menu controls that rely on consistent but customizable images to render themselves.
All you need to do is provide your skin with a relative URL to the image. ASP.NET will take care of fixing up the URLs.

Under The Hood

When a request arrives for an ASP.NET 2.0 site, the runtime will parse and compile the App_Themes directory into assemblies. Although we might not think of a theme as being “code” (nor may a theme or skin file actually contain any code) – the runtime does turn each theme definition into code inside an assembly.
Each assembly will contain a class representing the theme – this class will derive from System.Web.UI.PageTheme. The class will contain a LinkedStyleSheets property that returns an array of string – the filenames for the styles of the theme.
The class will also maintain a dictionary data structure. The key into the dictionary is a type (like typeof(Label) and typeof(Calendar). Given the key, the dictionary will return a ControlSkinDelegate. The delegate is a pointer to the method that “builds” a control according to the rules in a skin file. For example, the skin file for our label produced the following method.

private Control __BuildControl__control11(Control ctrl)
{
      Label label1 = (Label) ctrl;
      label1.ForeColor = Color.BlueViolet;
      return label1;
}
When the runtime sees that a page has a theme, it walks through the Controls array of the page and checks to see if there is a delegate available to skin the control based on the type of the control. If an entry exist, the runtime will invoke the delegate, which in the case of a Label in an Odeish page theme will execute the above code.

Themes and Master Pages

As we alluded to earlier in the article, there can be some overlap between themes and master pages. In the previous article we actually controlled the layout of our application by defining <div>s in our master page and specifying the layout of the <div>s in a .css file.
The above approach is a viable approach when using themes. Push your layout defining css into the themes folder for the ultimate power and flexibility. Your master pages will continue to define the basic structural elements and common content for every page.

March 02, 2012

Generating unique IDs for machine in JAVA

When identifiers are used solely within a database, their generation should be left to the database itself. (See Statement.getGeneratedKeys.)
Unique identifiers which are "published" in some way may need special treatment, since the identifier may need to be difficult to guess or forge. A typical example is the value of a cookie used as a session identifier - simply using a series of consecutive integers is generally unacceptable, since one user could easily impersonate another by altering the value of the cookie to some nearby integer.

Style 1 - UUID

When Java 5 is available, the UUID class provides a simple means for generating unique ids. The identifiers generated by UUID are actually universally unique identifiers. Example

import java.util.UUID;

public class GenerateUUID {
  
  public static final void main(String... aArgs){
    //generate random UUIDs
    UUID idOne = UUID.randomUUID();
    UUID idTwo = UUID.randomUUID();
    log("UUID One: " + idOne);
    log("UUID Two: " + idTwo);
  }
  
  private static void log(Object aObject){
    System.out.println( String.valueOf(aObject) );
  }
} 


Example run :
>java -cp . GenerateUUID
UUID One: 067e6162-3b6f-4ae2-a171-2470b63dff00 
UUID Two: 54947df8-0e9e-4471-a2f9-9af509fb5889
If Java 5 is not available, then there are other more laborious ways to generate unique ids (see below).

Style 2 - SecureRandom and MessageDigest

The following method uses SecureRandom and MessageDigest :
  • upon startup, initialize SecureRandom (this may be a lengthy operation)
  • when a new identifier is needed, generate a random number using SecureRandom
  • create a MessageDigest of the random number
  • encode the byte[] returned by the MessageDigest into some acceptable textual form
  • check if the result is already being used ; if it is not already taken, it is suitable as a unique identifier
The MessageDigest class is suitable for generating a "one-way hash" of  arbitrary data. (Note that hash values never uniquely identify their source data, since different source data can produce the same hash value. The value of hashCode, for example, does not uniquely identify its associated object.) A MessageDigest takes any input, and produces a String which :
  • is of fixed length
  • does not allow the original input to be easily recovered (in fact, this is very hard)
  • does not uniquely identify the input ; however, similar input will produce dissimilar message digests
MessageDigest is often used as a checksum, for verifying that data has not been altered since its creation. Example

import java.security.SecureRandom;
import java.security.MessageDigest;
import java.security.NoSuchAlgorithmException;

public class GenerateId {

  public static void main (String... arguments) {
    try {
      //Initialize SecureRandom
      //This is a lengthy operation, to be done only upon
      //initialization of the application
      SecureRandom prng = SecureRandom.getInstance("SHA1PRNG");

      //generate a random number
      String randomNum = new Integer( prng.nextInt() ).toString();

      //get its digest
      MessageDigest sha = MessageDigest.getInstance("SHA-1");
      byte[] result =  sha.digest( randomNum.getBytes() );

      System.out.println("Random number: " + randomNum);
      System.out.println("Message digest: " + hexEncode(result) );
    }
    catch ( NoSuchAlgorithmException ex ) {
      System.err.println(ex);
    }
  }

  /**
  * The byte[] returned by MessageDigest does not have a nice
  * textual representation, so some form of encoding is usually performed.
  *
  * This implementation follows the example of David Flanagan's book
  * "Java In A Nutshell", and converts a byte array into a String
  * of hex characters.
  *
  * Another popular alternative is to use a "Base64" encoding.
  */
  static private String hexEncode( byte[] aInput){
    StringBuilder result = new StringBuilder();
    char[] digits = {'0', '1', '2', '3', '4','5','6','7','8','9','a','b','c','d','e','f'};
    for ( int idx = 0; idx < aInput.length; ++idx) {
      byte b = aInput[idx];
      result.append( digits[ (b&0xf0) >> 4 ] );
      result.append( digits[ b&0x0f] );
    }
    return result.toString();
  }
} 


Example run : >java -cp . GenerateId
Random number: -1103747470
Message digest: c8fff94ba996411079d7114e698b53bac8f7b037

Style 3 - UID

Finally, here is another method, using a java.rmi.server.UID. The Serializable identifiers generated by this class are unique on the host on which they are generated, provided that
  • the host takes more than one millisecond to reboot
  • the host's clock is never set to run backwards
In order to construct a UID that is globally unique, simply pair a UID with an InetAddress. Example

import java.rmi.server.UID;

public class UniqueId {

  /**
  * Build and display some UID objects.
  */
  public static void main (String... arguments) {
    for (int idx=0; idx<10; ++idx){
      UID userId = new UID();
      System.out.println("User Id: " + userId);
    }
  }
} 

Example run :
User Id: 3179c3:ec6e28a7ef:-8000
User Id: 3179c3:ec6e28a7ef:-7fff
User Id: 3179c3:ec6e28a7ef:-7ffe
User Id: 3179c3:ec6e28a7ef:-7ffd
User Id: 3179c3:ec6e28a7ef:-7ffc
User Id: 3179c3:ec6e28a7ef:-7ffb
User Id: 3179c3:ec6e28a7ef:-7ffa
User Id: 3179c3:ec6e28a7ef:-7ff9
User Id: 3179c3:ec6e28a7ef:-7ff8
User Id: 3179c3:ec6e28a7ef:-7ff7
Clearly, these are not secure identifiers - knowing one, it is easy to guess another.

How to get a unique computer identifier in Java (like disk id or motherboard id)

How to get MAC Address of client Machine

NetworkInterface[] nics = NetworkInterface.GetAllNetworkInterfaces();

        for (int j = 0; j <= 1; j++)

        {

            PhysicalAddress address = nics[j].GetPhysicalAddress();

            byte[] bytes = address.GetAddressBytes();

            for (int i = 0; i < bytes.Length; i++)

            {

                M = M + bytes.ToString("X2");

                if (i != bytes.Length - 1)

                {

                    M = M + ("-");

                }

            }

        }

we uniquely identify a client in ASP.net

Dear Friend,


string[] computer_name = System.Net.Dns.GetHostEntry(Request.ServerVariables["remote_addr"]).HostName.Split(new Char[] { '.' });
            String ecn = System.Environment.MachineName;
            txtECN.Text = computer_name[0].ToString();

This link will do the thing for you:-

http://forums.asp.net/t/821809.aspx/1[^]